Tuesday, January 31, 2012

'Smores Without a Campfire

"This is 'smores stuff. First you take the graham. You stick the chocolate on the graham. Then, you roast the mallow. When the mallow's flaming, you stick it on the chocolate and cover it with the other end. Then, you scarf."  ~ The Sandlot

There are three secrets to the amazingness of these 'Smores:
  1. Homemade Graham Crackers
  2. Dark Chocolate
  3. No campfire needed!
They package nicely as a gift!

 
After 5 minutes in the oven (@400), they come out toasty, melty and warm 

I don't even know where to start on how much I love these 'Smores Without a Campfire. I only know about them because they were given to me as a gift by my sweet friend, Celani. She perfectly packaged the homemade graham crackers, dark chocolate and large marshmallows along with the recipe and instructions. She also included a fluted pastry cutter and the cinnamon sugar topping so I could re-make the graham crackers. Let me tell you, this was a wonderful gift to receive!  I enjoyed eating them the first time, and I have enjoyed making them for my family and friends again and again. 

So, here's the thing. You COULD use store bought graham crackers and make these 'Smores by following 3 simple steps: assemble 'Smores, bake @ 400 for 5-7 minutes, and enjoy!  

But... you would be missing out on a real treat if you didn't make the homemade graham crackers. They are special.  They are worth the effort to make. In fact, last summer, I made a batch of these and packed them in my carry-on luggage so that we could make 'Smores Without a Campfire on vacation. 

Homemade Graham Crackers (adapted from Gifts Cooks Love
1 1/2 cups graham flour, plus more for dusting
3/4 cup all-purpose flour
3/4 teaspoon kosher or sea salt
1/2 teaspoon baking soda
1/2 teaspoon ground cinnamon
4 tablespoons unsalted butter, room temperature
1/3 cup packed light brown sugar
1 large egg
1/4 cup honey
2 teaspoons pure vanilla extract
1/4 cup turbinado sugar (or Sugar in the Raw) mixed with about 1 tsp cinnamon


In a large bowl, sift together the graham flour, all-purpose flour, salt, baking soda and cinnamon. Set aside.  In the bowl of a stand mixer fitted with the paddle attachment (oops, I used the whisk!), beat together butter, salt and egg on high speed until smooth (2-3 minutes.) Add the honey and vanilla and beat until smooth, scraping down the sides as needed. With the mixer on low, add 1/2 the flour and combine. Add the remaining half and mix until just combined - don't over mix!  Press the dough into a flat disk (I did this on my pizza stone), cover in plastic wrap, and refrigerate for 30 minutes. 


Preheat oven to 350 and line 2 baking sheets with parchment paper (don't skip the parchment paper - my grahams stuck on non-stick cookie sheets without it.) Roll out parchment paper for a work surface and liberally dust it with graham flour. Roll out the dough, as close to a square as possible, 1/8" thick. Use a pastry cutter with a fluted wheel to cut graham crackers into desired size. (I cut most of mine slightly larger than the chocolate squares for 'Smores; but I cut a few bite-sized grahams for snacking.)  

Transfer grahams to parchment lined baking sheet, about an inch apart. Poke holes into each graham.
Sprinkle with cinnamon-turbinado sugar mixture. Bake at 350 for 14 minutes, or until slightly browned. Transfer to wire racks to cool.
Once graham crackers have cooled, top with dark chocolate squares (I used 2 chocolate squares per graham) and marshmallows (I used 1 large 'mallow per graham... 2 ended up being too much!)
Toast 'Smores in the oven at 400 for 5-7 minutes, or until 'mallow is toasty, chocolate is melty, and graham is soft. They will look like this:

After 5 minutes in the oven (@400), they come out toasty, melty and warm 
Unused homemade graham crackers can be stored, airtight, on the counter for up to three weeks. Or... packaged and given as gifts.
I stored the homemade grahams and the 'mallows

Print Recipe Here.

Monday, January 30, 2012

Oven Ranch Chicken

This is an easy and flavorful recipe.  Throw some chicken in a bag with Ranch dressing and marinate for a bit. Toss them in some bread crumbs and cheese and bake.

Saturday, January 28, 2012

Mélanger

Sample Dessert Bar Stylings by Mélanger
Did you know that Mélanger is a French verb meaning to "mix or blend"? I know this because my friend, Celani, recently started her own business: Mélanger   

Mélanger sells homemade confections (made from organic products whenever possible) and specializes in dessert bar styling for parties and events in the Houston area.  So, Celani not only bakes delicious desserts, but packages and presents them in a way that brings big smiles.  I know first hand: she baked cupcakes and helped us style a "Make Your Own Cupcake Sundae" bar at WP's 2 year old birthday party. There were lots of smiles from kiddos as they got to grab handfuls of bright candy to top their Cupcake Sundaes with. It was fun to watch.   
I cherish this picture (and the memories) of WP's 2nd Birthday
and the "Make Your Own Cupcake Sundaes" Celani provided!
If you are in the Houston area and need homemade treats for Valentine's Day, or any special occasion, keep Celani in mind. She is as sweet as the treats she bakes, and we know you will love working with her!


We have an upcoming post, inspired by Celani, that we are very excited about!! Stay tuned....
  
Mélanger is a “cottage food production operation” under Texas Health and Safety Code Section 437.001(2-b). For a complete menu of confections, please visit www.melangerdesserts.com.


Love, Lauren

Friday, January 27, 2012

Snowmen Fruit Kabobs

I got the idea for these "Snowmen on a Stick" from February's issue of Disney Family Fun. Even though we have been wearing shorts and running the AC here in Houston, it must be snowing somewhere!! Regardless of weather, these guys are a cute, fun snack! 

Here is the list of ingredients I used, but you could get creative with whatever you have around the house:
  • Wooden skewers
  • 1 banana, sliced into thick slices (1/2" - 1")
  • Pretzel sticks
  • Fruit leather/sour straws (for scarves)
  • Orange Starburst, sliced for nose (cantaloup or carrots would work too)
  • Sprinkles, chocolate chips, mini chocolate chips and/or raisins for eyes and buttons
  • Apple slices,  strawberry slices, blueberries and/or marshmallows (for hats) 

Make sure to slice the banana thick enough. If you slice it too then, it will tear apart when you skewer it. Assemble snowmen and snack away! WP loved these and got excited naming all of the different fruit. "Oh.... a raisin!" 


Thursday, January 26, 2012

Ravioli with Pesto, Sausage, & Spinach

In the search for easy recipes, I sent an email out to the moms in our neighborhood asking for input. One of the tips was to keep pasta on hand, specifically frozen ravioli or similar.  She suggested making soup or tossing it with anything you have on hand to make a hardy meal.  

Another momma said that she loved store-bought pesto.  In addition to putting it in the obvious pasta dishes and sandwiches, she puts it in her mashed potatoes! I always made our pesto but buying it premade is a great time saver- herbs, nuts, oil, garlic, and cheese READY TO GO!

Wednesday, January 25, 2012

Crayon Resist

KD knows his letters and numbers but doesn't have the fine motor skill and strength necessary to write them clearly.  He doesn't really care to sit and color for extended periods of time so I've been googling and inquiring about helping him with these skills.  Adding some interest to coloring and painting helps hold their attention so we tried a crayon resist.  We used regular paint but I think it would have worked much better with water colors.

Give your little one paper with crayons of similar colors.  Then let them go at it with paint.  You can also write messages or draw shapes and have them search for it on the the paper using their paint brush.
Isn't that the sweetest hand you've ever seen?! 

Tuesday, January 24, 2012

Store Bought Snacks


We have a new "page" for our blog! Check out Store Bought Snacks!
We added this page because, well, we all buy stuff from the store.  And deciding what snacks to buy (or not buy) for your kids can be overwhelming.  You want something nutritious and tasty; your kid wants anything with a Disney character on the box. We know... us too.

Many of the snacks that have become staples in our families started as ideas we got from other moms. In fact, one of our favorite things about play groups (besides chatting with grown ups) is seeing what snacks other kids eat. 

So, we designed our Store Bought Snacks page to be like a virtual play-date where we can share the good, store-bought stuff our kids snack on. We won't lie: some days, our kids snack on cookies or marshmallows. But we try, mostly, to provide them with snacks that have nutritional value. When we find a snack that we feel good about AND that they like, we will post it here

Our disclaimer is this: we try hard not to judge other moms, and we ask that you try hard to not judge us.  We aren't dietitians and we don't know every thing about every food. We are just trying to improve what we feed our kids. We spend a considerable amount of time and money buying and trying different snacks... and when we find something that we approve of and that our kids like, we are excited!  We check nutrition labels, but we don't claim these foods (or ourselves) to be perfect!  Of course, we encourage you to do your own research and only buy the foods that are a good fit for your family.  But we hope this can be a helpful starting place to give you several ideas of store bought snacks. 

Love, Kim & Lauren


Sunday, January 22, 2012

Repurpose Baby Spoons


Do these plastic baby spoons accumulate in your house like they do in mine?  If your kid is starting to outgrow them, but you aren't ready to throw them out, you can repurpose them:
  1. As tasting spoons. (This one is my favorite - I do it all the time. I am constantly tasting what I cook.) 
  2. For eating Fage yogurt (I love this stuff, but a regular spoon won't fit in the tiny compartment with the fruit topping. Actually, I've started to use these baby spoons with any yogurt or ice cream. Taking lots of tiny bites helps the snack last longer and feel like more!)
  3. Alongside shot-glass desserts (I'm so glad restaurants like P.F. Chang's now offer 'mini' desserts - often served in tiny glasses.  I recently used these spoons with my Peanut Butter Parfait recipe.) 
  4. As serving spoons for condiments (the plastic ones would be cute for a BBQ cookout or kid's party and silver baby spoons would be great for a shower - to serve nuts, candy, etc...)
I wanted to have a nice, round number of ideas, but couldn't think of a 5th. Can you?

Thursday, January 19, 2012

My Kid Ate Zucchini!!

He has refused to eat it before, and he will refuse to eat it again... but, tonight, WP ate his zucchini!  I think he really liked it. This made me happy because there are SO MANY things that I prepare and put on his plate that he won't eat.  But to have him eat a green vegetable... I'll take it when I can get it!

From here, I diced WP's zucchini into even smaller "bite sized" pieces.
Here is the recipe for tonight's zucchini: maybe the mozzarella is what makes it toddler approved?  This goes well as a side dish with just about anything, but tonight, I served it with Mediterranean Chicken. (My husband and I have liked this long before we had a kiddo... ever since our friend Sarah made it for us.  It's tasty, healthy and colorful. I have included the recipe here in case you want it. The original recipe called for skin-on chicken breasts, but I use boneless skinless.)

I acknowledge that these pictures are no good. I wasn't even planning on taking pictures of this meal... but when the boy ate his vegetables, I wanted to share the recipe!

Skillet Zucchini

1 T (or less) Extra Virgin Olive Oil
2-3 zucchini (halved lengthwise, then cut into half-moons about ½” thick)
2-3 garlic cloves
¼ cup shredded mozzarella cheese
salt & pepper

Heat a skillet over medium high heat. Add Olive Oil. When oil is hot, add zucchini and garlic. Stir and sauté the zucchini and the garlic in the skillet for a few minutes until the zucchini is tender but not mushy – usually about 5 minutes. Add salt and pepper to taste. Remove from heat. Top with the mozzarella cheese and allow the cheese to melt in the skillet, over the zucchini, before serving. (Dice zucchini even smaller before serving to toddlers.)

Print Recipes Here


Mediterranean Chicken


Easy Granola Bars from MountainMamaCooks


I came across Mountain Mama Cooks when browsing the comments for the cookie swap.  Her blog is beautiful and pretty funny.  I feel like we must have crossed paths at some point in our lives.  Someday, we'll exchange journals (I don't keep one- but if I did, she could read it) and say, 'you were at ------- in 19--?! Me too!' Then, we'd eat . . . 
Picture From Mountain Mama Cooks
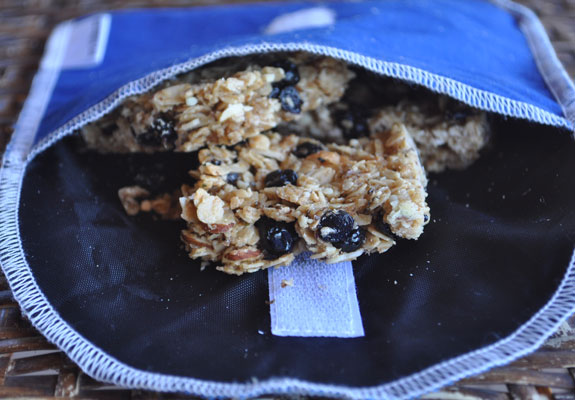
So, to warm her up a bit, I've made one her recipes. The first time I made this, I tried to go by memory for the ingredients and forgot some at the store so I didn't follow it exactly.  I used honey instead of maple syrup and crannies instead of blueberries (Wholefoods no longer carries them!!!!). They still turned out really good but they didn't stay together as well as I would have hoped.  So I made them again!  This time I used raisins and some cinnamon and the maple syrup.  It was really good and did stay together better but I think my favorite part was the crumbles- on yogurt, in some milk, etc. YUM!  Please go here for her recipe.
Next time I make this I will use less coconut.  It was good but a little too strong for the whole family (my husband). I also found this unsweetened toasted rice cereal (in the bulk bag in the front) which KC loved and worked great in these bars substituting for some of the oatmeal or almonds.
Toasted almonds, coconut, and oatmeal.  Can you smell it??
Simmering syrup and butter. You add the vanilla, salt, and cinnamon before pouring.
I ladled the syrup over the dry ingredients and mixed with a rice paddle (I'm Japanese!) until it was evenly distributed then poured it out into a 9x13.
My grandma made wonderful 'Energy Bars' which were essentially kicked up Rice Krispy treats.  She always laid out plastic wrap to press down the mixture.  
Genius
Out of the oven to cool.  I cut them later that night then packaged them (mostly in my stomach) and completely forgot to take a picture.  Oops.
This recipe is pretty customizable.  Any dried fruit or nut would work and I think adding some kind of chocolate chip or drizzle would be nice too.  Thank you to Mountain Mama!

Lauren delivered some of Mountain Mama's Mashed Veggies to me the other night, and they were amazing!  That recipe is definitely a keeper.  KC liked them until he tasted the Chicken Parmesan (or 'chicken pizza') at which point he completely ignored the mash and dug into the chicken. Sweet boy:)

Tuesday, January 17, 2012

Crock Pot Bolognese with Buttered Angel Hair Pasta

I found the original recipe for Crock Pot Bolognese at Skinny Taste. I modified it a bit and am VERY happy with how it turned out. It was easy to make and turned out to be a nutritious, filling, delicious meal.  This tasted like one of those home-cooked meals that someone's grandma stood over the stove all day to make. And it is a home-cooked meal... but I didn't stand over the stove (very long AT ALL) to make it!

WP liked it.... not that it's hard to get a toddler to like pasta. But he took bites of it on his own, and that's a win in my book. The husband and I liked it too, and I will definitely make this again. 

The recipe makes a lot of Bolognese sauce, so I will be freezing half for a future dinner - another win!


Speaking of freezing, the recipe calls for red wine. I really think the wine enhances the flavor and is worth adding. Don't worry about the kids, the alcohol cooks out!  I had some red wine in the freezer (I freeze what we don't drink in plastic containers), and I just threw a whole frozen chunk of red wine right into the crock pot.  It melted and blended right in perfectly!
  
WP says "Mom, thanks for making dinner for us!"

Crock Pot Bolognese with Buttered Angel Hair Pasta


· 3 oz pancetta, chopped (or center cut bacon)
· 1 medium yellow onion, minced
· 2 celery stalks (about 3/4 cup), minced
· 2 carrots (about 3/4 cup), minced
· 1 lb ground sirloin
· 1 lb lean ground turkey
· 1/4 cup red wine
· 2 - 28 oz cans crushed tomatoes
· 3 bay leaves
· salt and fresh pepper
· 1/4 cup chopped fresh parsley
· 1/2 cup half & half cream
· 8 oz angel hair pasta, cooked
· 1 tablespoon butter
· Freshly grated Parmesan cheese

Heat a large deep saute pan over medium heat. Sauté pancetta until the fat melts, about 4-5 minutes. Add onions, celery and carrots and cook until soft, about 5 minutes. Add ground sirloin, ground turkey and saute until browned.


Drain the fat then add the mixture to the crock pot. Add wine, tomatoes, bay leaves, and salt and pepper to taste. Stir to combine, cover and set slow cooker to LOW for 5-6 hours.  

While the sauce cooks, cook the angel hair pasta according to package instructions.  Angel hair pasta typically only takes 4 or 5 minutes to cook. When the pasta is done, drain the pasta water away. Return the pasta to the pot, add 1 tablespoon of butter and stir until the butter melts. Cover until ready to serve.

After 5 or 6 hours of simmering in the crock pot, add half & half and parsley to the Bolognese sauce. Adjust salt and pepper if needed. Serve over Buttered Angel Hair Pasta and top with Parmesan cheese.


Print Recipe Here

A whole quart of sauce is going in the freezer for next time!

I hope you enjoy this dinner as much as we did. If you need a good movie to go along with a good dinner: Money Ball. My husband and I watched it as I wrote this post and both loved it. What a GREAT movie.


Love, Lauren
 

Sunday, January 15, 2012

Finisher

I'm very proud of my husband who ran his first marathon today!  He had two enthusiastic little cheerleaders wearing homemade shirts that got a lot of 'that is cute' comments and looks.
I made them using printable iron-on transfers. They are an easy way to make your own original t-shirts.  I scanned my husband's bib and printed it in mirror-image on to the iron-on paper (always do a test until it comes out just how you'd like and laser doesn't work on this paper).  Then, simply ironed it on to two plain T-shirts.  I added safety pins so it looked liked their daddy's.

I have to 100% agree with the 'cute' comments:)
Kim

Friday, January 13, 2012

Chocolate Peanut Butter Parfait


This tasty Chocolate Peanut Butter Parfait is low in fat and sugar... shhh! My mom used to make these when I was in high school, and I've liked them ever since. It's a dessert with low Weight Watcher's points... but you would never know based on how good it tastes! (I don't know the exact points - sorry!) I recently made these when we had friends over for dinner. I made the 'grown up' parfaits in clear plastic cups but saved a little extra and made WP one in a votive holder. (This was the perfect size for a kid! A shot glass would work too.)

After he ate his dinner, I surprised him and said, "I have a dessert for you." I handed him the parfait and his little face just lit up. It was priceless. I will make these again soon just so I can see that look on his face.  Not to mention the fact that every day since I made them, he has asked "Mom, do you have a dessert for me?"  

By the way, our grown up friends liked them too. If you make them ahead of a dinner party or birthday party, just keep them covered and in the refrigerator until ready to serve.


Keep Reading for Recipe

Wednesday, January 11, 2012

Mini Carrots & Mashed Root Vegetables


I recently found the Mashed Root Vegetable recipe on Mountain Mama Cooks and really like it! It has all of the 'comfort-food-ness' of mashed potatoes, with unique colors and flavors added from the sweet potato, celery root and parsnips. 

I added the carrots on top because I am  trying to expose WP to carrots. So far, he is not a big fan of them. But I heard here that a toddler may need to taste a food up to 10 times before they like it!  I have a bunch of carrots in my fridge, so I am trying to creatively and repeatedly incorporate them into lunches, snacks, and dinners. I try to make it fun for the boy, so I 'planted' the carrots and made it look like they are growing!

I made a few alterations to Mountain Mama's recipe:

Mini Carrots & Mashed Root Vegetables 

1 sweet potato
1 celery root
3 medium red potatoes
2 parsnips
½ cup milk
2 tablespoons butter
2 cloves garlic, crushed
salt
parmesan cheese (optional)
baby carrots (see below)


Bring a large stock pot of water to a boil. While the water boils, peel and cube the root vegetables into roughly 1 inch cubes.

When the water boils, add the celery root and return to a boil (it takes longest to cook). After about 10 minutes, add the sweet potato, red potatoes and parsnips. Boil for an additional 15-20 minutes until all vegetables are soft.

Immediately drain the water and add the vegetables to a mixing bowl (don’t allow them to sit in the water – they will get starchy/sticky.) Add milk, butter and garlic to the vegetables and mix until well combined and smooth. This may take a few minutes on medium-high speeds. If you have a potato ricer, you can use that instead of a mixer. Add salt and/or Parmesan cheese to taste.  Top with baby carrots so that it looks like the carrots are growing out of the mash.

For the carrots:
Peel the bottom end of a baby carrot until the bottom end resembles a tip.  Cut off the top end of the baby carrot so it is flat.  Poke a small hole in the top end with an ice pick. Add a parsley garnish. 

Print recipe here.

Love, Lauren

'Baby' carrots
Sweet potato, red potatoes, celery root & parsnips

cubed, cooked root vegetables

Tuesday, January 10, 2012

Easy Chicken Noodle Soup

I turned the leftovers into Creamy Chicken Noodle Soup. Bread-sopping good!

I am not a person who gets sick often but this season has been tough on our family.  The boys got sick on Christmas Eve and my DH and I kissed the germs right into ourselves. That's the third time since October! Chicken noodle soup is the best medicine, right?  We all love soup and it's one of the few ways that the little ones will eat their veggies.

This recipe is easy and really has the slow, homemade taste that makes soups so comforting.

Easy Chicken Noodle Soup
1 Rotisserie Chicken, meat removed from bones and juices reserved
1 medium Onion, diced
2-5 Carrots, diced
2-3 Ribs of Celery, diced
2 tsp dried Thyme (or about 5 sprigs fresh- I throw them in whole then pull it out before serving)
1 Bay leaf
8 cups of Chicken broth
2-3 cups of egg noodles
Put everything except the noodles in a large stock pot and bring to boil. Lower heat and simmer for 15-25 minutes, or until onions are soft.  Raise the temperature to bring back to a rolling boil. Add noodles and cook.  THAT IS IT! 

Serve with crusty yummy bread and a salad. I love it topped with some shaved Parmigiano Reggiano.  It can be expensive ($20+per pound) but a little goes a long way! It makes pastas extra special with no effort!
Variations:
Chicken Tortilla soup
Stir in a jar or your favorite salsa (add whitebeans if you have them) and top with tortillas, sour cream and green onions.  Fresh cilantro, sliced fresh jalapenos, and a squeeze of lime will put it over the top.

Creamy Chicken Noodle soup
After the noodles are cooked, remove a cup or two of liquid and combine with two cans of cream of mushroom or celery soup.  Add back into the soup and stir well. I added one can to our leftovers (pictured above) which was a great change up.

Slow Cooker
Cook all ingredients (except noodles) on low for 4-6 hours, turn to high and add noodles for 20 minutes.

If you're keeping up, add this one to you meal-planning binder;) Kim

Sunday, January 8, 2012

Mini Meat Loaves (AND Meal Planning)


A friend of mine recently asked me about meal planning and I sent her a long email with a plan.  After sending it, I realized that the grocery bill was probably high  (especially since she lives in NYC) and maybe too much trouble for the results.  It really got me thinking about my own planning and why I get burnt out on cooking every night.  The kiddos being so demanding right before dinner is a huge part of it but it's easy to get in a cooking slump anytime, with or without kids.  I'm rethinking my strategy and have been on a mission to find recipes and meals that work for me and my family.

I am looking for recipes that have most or all of these qualities-
1. use few ingredients, keeping cost in mind
2. few dishes are needed to prepare = less dishes to wash
3. contain Protein, Produce, and Grain (Dairy is a bonus; Healthy is great too!)
4. can easily be made ahead and/or frozen (I seriously want no more than 15 minutes of hands on time when the kids are hungry)

I've tried a few recipes this past week and the favorite by far was the mini meat loaves. It is all over the internet as the 'lil cheddar meatloaves' so I don't know who to give credit to.  I doubled the recipe without having to get out a humungous bowl and I made it earlier in the day and popped it in the oven at dinner time.  The small meatloaves cooked quickly in the oven which was very nice.  I made Lauren's Green Beans (I use frozen beans) which were perfect, as always. To try and cut time more, I used boxed mashed potatoes.  I have memories of this being good but they were not at all good and not worth the savings- time or money.  I need to find an alternative quick potato . . . Suggestions?? 
Click 'READ MORE' below for the Meat Loaf recipe!!

Saturday, January 7, 2012

How to Chop an Onion


Learning this technique made me feel like a chef- fo' real. My eyes are always on fire when I cut onions but this is so fast that I can usually get by without wincing.  I use this method even when I'm doing a thicker dice.  It's just so much faster and you get a more uniform sized dice.

Other helpful tips are to keep your onion in the fridge and to use a sharp knife.  My grandma always put tissue in her nose, which helps.  I wore swimming goggles in college, which helped. I've also heard that holding a match between your teeth while chopping helps . . .

THE TECHNIQUE:
Basically, you cut an onion in half, splitting the root.  Cut off the other end and peel off the outer layers.  Using the tip of your knife pointed at the root, make thin parallel slices, being careful not to go through or past the root. Hold the slices together and make a few cuts perpendicular to the ones you just made.  Now, slice your onion.  Genius! Watch this short instructional video.