Monday, December 19, 2011

Kid-Friendly Gingerbread Cookies


I love gingerbread cookies, and can't seem to get enough of them this year!  This is a great recipe to use if you are making cookies for or with kids, because: 
  • The dough is very forgiving - not too sticky, and pretty easy to roll out and cut (even for little hands)
  • The cookies taste like gingerbread, but they are mild and not as 'spicy' as some gingerbread cookies
  • The cookies are nice and sweet - even if you cut down on the sugar by using sugar-free pudding mix
  • The mini gingerbread men are the perfect bite-sized sweet treat for kids and grown-ups. Because the dough is easy to work with, making the mini version is not hard!
This recipe is from the sister of one of my best friends. She gave me the recipe when I got married, as part of a cook book that some friends put together for me. It's a keeper, and I hope it becomes a holiday tradition for you and your kids!  


Gingerbread Cookies
1 packaged butterscotch pudding mix (sugar free can be used)
1/2 cup butter
1/2 cup packed brown sugar
1 egg
1 1/2 cups all purpose flour
1/2 teaspoon baking soda
1 1/2 teaspoons ground ginger
1 teaspoon cinnamon


Cream together pudding mix, butter, and sugar until smooth. Add egg and mix until combined.
Combine flour, baking soda, ginger and cinnamon. Slowly add dry mixture to pudding mixture and stir until combined. Cover and chill dough until firm - at least 1 hour. 
Preheat oven to 350. Grease baking sheets. On a floured board, roll dough to about 1/8" and cut into desired shapes.  Place on baking sheets and bake for 1o-12 minutes, until cookies are golden at edges. 
Remove quickly from baking sheets and allow cookies to completely cool on wire racks. Frost with Gingerbread Cookie Icing. 


Gingerbread Cookie Icing
4 egg whites
4 cups sifted powdered sugar


Beat eggs until foamy. Gradually add sugar. Beat on high until thickened. Add food coloring if desired. 
Add icing to desired piping tool (piping bags, candy-making bottles, or even Ziploc baggies with one corner snipped off - like this) and apply to cookies. 


For a really great tutorial/article on Royal Icing (which is very similar to the Gingerbread Cookie Icing), click here.  


Print recipe here

I may use these mini gingerbread men in our advent calendar next year. The candy didn't work out so well this year - it made WP a little too crazy (and then cranky.) But these cookies are just a tiny bite of sweetness. They could even be made ahead of time and then stored in the freezer until needed. 


Love, Lauren

Friday, December 16, 2011

Be Consistent!


I just read an article on msnbc.com about how babies just over a year display trust and distrust based on their adult.  Basically, they had 60 babies aged 13-16 months old paired with an adult who was either truthful and sincere or the opposite.  Babies who were paired with truthful adults copied their adult who tried to turn on a light switch with their foreheads while the babies paired with LIARS did not trust them enough to copy the behavior.  

Hmmm . . .

I've been struggling with being consistent and following through . . . oh yeah, AND trying to get things done.  I can 100% see that when I don't follow through with the boys, the poor behavior gets worse.  When I don't follow through, I'm basically lying to them and they therefore stop trusting what I'm telling them. That's right, THEY STOP LISTENING! 
"Whucha gonna do about it, WOMAN?!"

Thursday, December 15, 2011

Enchiladas Verdes Lasagna


This recipe is adapted from one of my favorite 'Green Enchiladas' recipes. Rolling individual enchiladas takes a little time, so I prefer this method of layering the ingredients 'lasagna' style. The taste turns out the same, with a lot less effort!
I serve this with any of the following things I have on hand: rice and beans, chips and salsa, queso, avocado, extra sour cream, etc...  


This is a favorite in our house and is one of those meals I take to people who just had a baby! :) 

Enchiladas Verdes Lasagna
18 corn tortillas
1 tablespoon extra virgin olive oil
1 medium onion, chopped
1 cup (8 oz) sour cream
2 cans cream of chicken soup (low fat/low sodium)
1 large (7 oz) can green chiles
1 (7 oz) can Herdez salsa verde*
2 large (10 oz) cans white chicken meat, drained
2 cups (16 oz) cheddar cheese, grated

For the sauce: Heat olive oil in a sauce pan over medium high heat. Saute the onion in the oil until translucent, about 5 minutes. Reduce heat to low and add the sour cream, cream of chicken soup, and green chiles to the onion. Stir or whisk the sauce together and heat until warmed.

For the filling: Mix together chicken and 1 1/2 cups of the cheese in a medium bowl.

To layer: Spread 1 cup of sauce in the bottom of a lasagna pan, or 9X13 baking dish. Place 6 tortillas over the sauce, to cover the bottom of the dish. Layer on top of the tortillas as follows: half of the chicken mixture, one third of the sauce, 6 tortillas, the remaining chicken mixture, one third of the sauce, 6 tortillas, remaining sauce. Top with cheddar cheese and bake at 350 until cheese is bubbly (about 30 minutes.)

*Note: you can assemble the dish early in the day and store in the refrigerator until ready to warm and eat. If you refrigerate first, cook at 350 for about 45 minutes. If you can't find the Herdez salsa verde, use about a cup of any salsa verde you like, or substitute with another 7 oz can of green chiles. 


If you make this all the time (like I do) and want a new variation, you can use Monterey Jack instead of Cheddar cheese and add 1 box of de-frosted, frozen, chopped spinach to the chicken and cheese mixture. 


Print recipe here

Love, Lauren


Wednesday, December 14, 2011

Veggie Muffins


Lots of fresh fruits and veggies go into these muffins!


I found the original recipe for these muffins in the Keeping Good Company cookbook I have here at home.  I love everything I have made from this cookbook, so when I saw all of the fruit and veggies in these muffins, I knew I had to give them a try.  To my delight, they tasted great, and WP ate them too!
As you can see, he can't keep his hands off them!
The original recipe was very good, but I made some modifications to make it more healthy and kid friendly.  They make great regular size or mini muffins and are one of my favorite things to take to a morning play date. I usually freeze the leftovers (any that won’t be eaten within 3 days) and then thaw them out in batches the night before I need them. They keep well in the freezer for a couple of months. 
Veggie Muffins

2 cups flour
1 cup sugar
2 tsp baking soda
1/4 tsp ground nutmeg
2 tsp cinnamon
1/2 tsp salt
1 cup peeled, grated carrots (2-3 large carrots)
1 cup peeled, grated zucchini (1/2 large zucchini)
1 large green apple, peeled and grated
2 eggs
1/4 cup applesauce (I use Central Market's Organic Cinnamon Applesauce)
1/4 cup vegetable oil
1/4 cup Greek yogurt (2% or whole; I use Fage)
1 tsp vanilla
Preaheat oven to 375. In a large bowl, sift together dry ingredients (flour through salt). Stir in carrots, zucchini and apples. In a smaller bowl, whisk together eggs, applesauce, oil, yogurt and vanilla and then add to the flour/veggie mixture.  
Spoon batter into greased, paper-lined, or silicone muffin molds, filling each cup to desired fullness.  They don't rise a whole lot, so it's fine to fill them to the top. The will rise a little, and some will spill over, giving you a nice, crusty top.  But you can fill them as little as 1/2 full if you want a smaller muffin for little hands. 
Bake regular size muffins 22-28 minutes (less for mini muffins), or until center of muffins springs back when touched. Cool for 5 minutes before removing from pan. 
Makes 12-24 muffins, depending on how full you fill each one.


Note: I have made these two ways: one way is to grate the veggies/apples and the other way is to pulse them in the food processor into fine pieces.  I prefer the grated way - you can see little grated pieces in the muffins, and you know what you are eating is fresh.  The grated pieces don't bother WP... but if your kiddo is big on texture, you may want to use the food processor to break the veggies/apple into tiny pieces that will be undetectable in the muffins. If you do this, the muffins might turn out a bit drier and/or need less bake time - so watch them closely.

Print recipe here

Love, Lauren

Kim says: "Thank you Lauren for dropping this off!  The boys loved them!!"
Now you see it . . .
Now you don't!

Tuesday, December 13, 2011

Pinterest Finds

If you aren't on Pinterest, you may be missing out.  It's basically an online pinboard that you can organize and share.  You can also follow friends or people you find interesting.  I've been having fun exploring different categories like arts & crafts, photography, kids, and gardening.  Her are a few fun ones I've pinned recently.
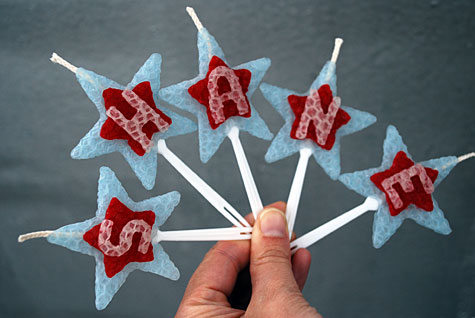
Beeswax DIY Personalized Candles from Merriment Design- soo cute and really simple!
Knob Rack from European Chic- Oh, the possibilities!
40 Ways to entertain your kids while laying down from babycenter.com-  I needed this last week! I think my favorite is "what's on my butt?"


Click here if you'd like to follow me.
Follow Me on Pinterest
~Kim

Signing with your Baby


KD had at least 60 signs by the time he was 18 months old.  He's three now and only remembers a few signs but the year I had signing with him was amazing.  It was very helpful and I truly believe built a stronger connection between us.  KC is 16 months now and is more verbal than his bro and was signing earlier too!
KC signing for the truck on his socks.  
A while ago a friend asked about signing with her son and it made me think about everything I have learned through the process.  If there is anything I've learned about being a mom, it's every little one is different and so is their environment.  I have two sons who have the same parents, home, etc but they have had completely different experiences growing up so far.  This post is meant to give some guidance to those interested in signing with their baby. Hopefully, you can give it a try or at least understand or appreciate other families who use it.

Monday, December 12, 2011

TGFBCS 2011 & a Giveaway!

The Great Food Blogger Cookie Swap 2011
That would be 'The Great Food Blogger Cookie Swap' if you aren't one of the 625 bloggers participating! The swap was hosted by Lindsay of Love and Olive oil and Julie of The Little Kitchen, who will be posting the 600+ cookie recipes on Thursday! 
Although we posted earlier about our cookie, now that the swap is over, we wanted to share more about our experience.  The cookie we sent was the Ginger & White cookie which is delicious and so pretty. We had so much fun baking, packaging them, and sending them to:
Raenell of Raevyn's Nest

We received cookies from different people than we sent them to. The cookies we have received so far are wonderful, and we wish we would've gotten to repay the favor! We will just have to sign up again next year! We have already received two packages with different and yummy cookies and look forward to getting a third soon!

The first one received was from Laura at Sprint 2 the Table.  Her Salted Chocolate Cashew cookies were just like we like them, with enough salt to taste and great textures throughout.  The cookie was soft and chewy and the toffee and cashews added a little crunch and a lot of yum.  Her blog is great too.  She writes about food and fitness. Her adventures in life, travel, and sport remind me of the person I wanted to be BEFORE my boys- ummm . . .  underground supper clubs, adventure racing and Roller Derby!  Maybe there's still hope for me- I think I'm pretty tough:) She also posts some workouts and inspiration about starting to exercise so go check it out!

Our second package came from Elizabeth from Big Body. Her Rosemary Shortbread cookies with candied Walnuts were wonderful!  When I opened the package, they smelled like Christmas! They are what I would call a 'shower cookie', or one that mainly women would appreciate.  For example, my DH suggested making some kind of cookie with Reese's PB cups in them and while I'm all for some good down-home cookies, a swap is generally for something extra special, right?? Anyways, this cookie would be a huge hit at a bridal or baby shower where the ladies would really appreciate the flavors and detail that went into the cookie.  The cookie was crunchy, buttery and aromatic, while the candied pecans added the perfect sweet/salty touch to balance it out.  They were beautiful too.  Sorry I didn't take a picture but Laura has a good one.

The TGFBCS was a lot of fun and really inspired us to get going on this blog.  We can't wait to do it again next year!

Ginger & White Cookies
¾ cup shortening
1 cup sugar
1 egg
4 tablespoons  molasses
2 cups flour
2 teaspoons baking soda
1 teaspoon salt
1 teaspoon ginger
1 teaspoon cinnamon
Sugar for coating
1 package white almond bark

Preheat oven to 350. In a large bowl, cream shortening and sugar together then add egg and molasses and mix well. In a medium bowl, whisk together dry ingredients (flour through cinnamon).  Combine all ingredients in the large bowl and mix to combine. Shape a tablespoon of dough into a ball. Roll in sugar. Bake for 12 minutes. Allow cookies to cool.

Melt almond bark according to package instructions.  Dip cookies half-way into the melted bark, then place on parchment or wax paper and allow to harden.  
  
Makes about 36 cookies.


Now, for the giveaway!  
We are making more cookies and would love to send some to you! I like chocomint AND ginger cookies but you can't ship them together unless you want minty ginger cookies.  
To enter-
Follow us and/or subscribe and then comment below whether you prefer a choco-mint or a ginger cookie by Friday 11:59 pm.  We will choose one from each type and send you a sweet gift:)

Good Luck!
Kim & Lauren

Sunday, December 11, 2011

Playing Memory for All Ages


My friend Kelly is the best at making handmade Christmas gifts.  She used to make them for our grandmas and now makes them for our kids.  One year she put together a vase with a betta fish and a plant for our grandmas.  My grandma loved her fish.  She told me how it would get excited when she came home or when she was about to feed it.  It was sooo sweet!  

This year, Kelly is my inspiration for making some gifts for my boys' friends.  I've decided to make a Photo Memory game.  It is in process and I will post a tutorial soon.  Here is a peak.  

While playing with KD, I realized that although he loved finding the pairs, I needed to get creative to make the game simple AND challenging to keep his interest.  I searched on the internet and found some great ideas and was inspired to come up with a few of my own.  

Friday, December 9, 2011

Ramen- Two ways

Ramen isn't exactly the healthiest meal to give a tot but for some reason they love it.  It falls into the category with hot dogs and chicken nuggets- it's high in sodium and there is little nutritional value.  In Hawaii, there are Ramen shops where the primary food served is noodles!  They are wonderful and one of the things I crave when I go home.  There are really some great ideas to take away from these shops.  For example, you can put anything you'd like in Ramen and you can serve it hot, cold, soupy or dry.  Also, a few simple condiments can make a big difference. The two ways I am going to show you are simple and add some good stuff for your little ones (and you).
Ramen
Package of ramen noodles (Chicken is most liked by the little ones but I prefer the miso or kim chee)
1 egg, slightly beaten in a bowl
Frozen peas (or mixed veggies.  carrots work well)

EXTRAS:
Green onions or chives, sliced finely
a bit of white pepper (black is ok too)
some sesame oil
leftover chicken, pork, turkey or other meat (you can serve it as is or mix bit of soy sauce and sugar and heat it together in a pan)
More suggestions!
Frozen wontons or gyoza
Cabbage
Mushrooms
Tofu
Greens-spinach etc
Bean sprouts

Put a pot of 4-5 cups of water over high heat till it boils.  Break the ramen into 4-8 pieces put into boiling water. After about 2:30 minutes, add the soup base.  Do not use all of the soup base if you are using less water.  Turn the heat down and stir.  Slowly, drizzle the raw scrambled egg to make a circle in the soup.  Do not stir.  If the egg doesn't cook in a few seconds, turn the heat up to medium. Once it's cooked, turn the heat off and add the meat, green onion, white pepper, sesame oil, and the frozen veggies.  The frozen veggies will cool off the soup and the soup will thaw the veggies. 

Serve in a bowl with a fork, a spoon for slurping, and chopsticks if you have them.

KC couldn't get enough.  He had two servings then drank the soup out of the bowl.

Fried Ramen
Package of ramen noodles (Chicken is most liked by the little ones but I prefer the miso or kim chee)
1 egg, slightly beaten in a bowl
Pork or chicken in any cooked form
Pinch of sugar
Soy sauce

EXTRAS:
Frozen peas (or mixed veggies.  carrots work well)

Green onions or chives, sliced finely

a bit of white pepper (black is ok too)

some sesame oil

leftover chicken, pork, turkey or other meat (you can serve it as is or mix bit of soy sauce and sugar and heat it together in a pan)
More suggestions!
Frozen wontons or gyoza
Cabbage
Mushrooms
Tofu
Greens-spinach etc
Bean sprouts

Put the water on the stove.  While it's heating, chop your ingredients.  Scramble an egg in a non-stick pan, S/P, then place in a bowl.  Put noodles in the water.  Add your meat and veggies to the pan with some oil (a couple drops of sesame is great).  A minute early, remove the noodles and put them into the veggies.  Put a teaspoon of the soop base, a pinch of sugar and one turn of soy sauce in the pan.  Add the egg, and mix it up.  Top with green onion and serve.


Hmmmm . . . granola bar or noodles??

Noodles!

Wednesday, December 7, 2011

A Family Meal from Tomato Soup


Here is a quick and easy way to turn tomato soup into a filling family dinner.  This recipe can definitely be prepared in under 30 minutes (no offense to Rachel Ray, but some of hers cannot - not by mere mortals like me anyways!) 

I am always surprised at how well WP eats this soup when I make it.  He ate a whole bowlful plus his entire Cheese Crisp last night! I think the trick is using the food processer to get the sausage to a very fine consistency after it cooks.

Tomato Soup with Italian Sausage and Pasta... served with Cheese Crisps

  • 32 oz of tomato soup.  I used Pacific tonight, but I've used other brands and it always turns out well. Just use which one you like - or make your own if you prefer. (Make sure to check the label on store bought - some tomato soup is VERY high in fat.)
  • 1 lb Sweet Italian Sausage links
  • 16 oz Pasta of choice
  • Cheese Crisps (recipe below)

Prepare pasta according to package instructions.  I usually let WP pick the pasta for this one. This time, he picked the little salad macaroni, and they worked well.

While the pasta cooks, heat a skillet over medium high heat.  Remove sausage from casing and add to skillet. Cook until browned, breaking up the sausage as you cook. Once sausage has browned and cooked through, add it to a food processor and pulse until the sausage is at desired consistency (optional.)

Warm soup in a large saucepan or small Dutch oven.  Add sausage and cooked pasta. Serve with Cheese Crisps alongside or crumbled into the soup. 

Now, for the Cheese Crisps. First of all, I have to say that I am so glad these are a real thing. For a long time, they were a happy accident in our house. By accident I mean that any time I 'spilled' cheddar cheese on my griddle, I would let it cook until crispy and then eat it as a snack - like a homemade Cheese-It. Delicious! But I always felt guilty about it... kind of like eating cookie dough with a spoon. For some reason, it feels way worse and way more indulgent than eating a cookie. Eating crispy cheese feels that indulgent.  I would've never confessed to it. Until... I found these little Parmigiano Reggiano Crisps pre-packaged and for sale at HEB.  They are legitimate! I can share the goodness of these without feeling guilty! 

All of that to say, if you can find these prepackaged crisps (in the fancy cheese section), buy them. They are a crisp, salty, and incredibly easy way to balance out the soup. If you can't find them, make your own.  My recipe is below, or you could also check out Alton Brown's oven version here:

My homemade Cheddar Cheese Crisps

Delicious store-bought Parmigiano Reggiano Crisps. These are fairly thick and were probably done in an oven.
Cheese Crisps


Heat a non-stick griddle to 350 degrees.  Sprinkle cheese in a round chip-sized area on the griddle. Don't sprinkle the cheese too thickly. You want the pieces to be touching or overlapping, but not piled on top of each other. You should have little holes in the crisps, and the finished version somewhat resembles a snowflake. Watch them closely - they get done in about a minute!  You will know they are done when the entire crisp is bubbly and lightly browned. Use a thin spatula to remove and allow to cool on a paper towel.  I used Cheddar cheese this time. Freshly grated parmesan or Parmigiano Reggiano would also be great.


Print recipes here


Tuesday, December 6, 2011

Nativity Scene Printable


Click here for a free printable nativity scene!

Below is a picture of the nativity scene assembled on our fridge. This is a great way to teach kids the Christmas story... and to keep them entertained in the kitchen while you cook!  Here are the instructions for use:

  1. Download and print the one-page, black & white PDF nativity scene
  2. Have the entire 8.5x11 page laminated ($1.99 at FedEx Kinkos. Or, check with teacher supply stores.)
  3. Cut out the separate nativity pieces
  4. Attach magnets to the back of each piece. I used craft magnets (found at Hobby Lobby, of course!) with a peel-off sticky back. I used a couple of different thicknesses to provide a little depth to the scene. 
  5. Let kids assemble the scene on the fridge.  FYI - the pieces can also be colored again and again with Crayola Window Markers, Dry Erase Crayons, or basic dry Erase markers.  If the pieces are laminated well, the color will wipe off with a wipe.

We would love for you to share this with others!  We just ask that you please provide the link to this post on our blog when sharing!

Love, Lauren


Sunday, December 4, 2011

Cookie Swap: Ginger & White Cookies


When we were tossing around the idea of starting a blog, an opportunity presented itself- A Blogger Cookie Swap hosted by Love & Olive Oil!  The deadline to sign up was three weeks away and we thought it would be a great way to decide if we really wanted to go forward with the blog.  We set some blogging goals for ourselves to achieve by the deadline and then started on our merry way.  On November 17th, we signed up for the swap and officially put our blog on.  Now, with cute cookies in the mail, we are sharing the site with a few more of our friends and family. We hope you like it and and look forward to reading your comments! ~Kim & Lauren
The first time I went to Lauren's home it was for a playdate and she had an impressive spread of food on the table, including THESE AMAZING GINGER COOKIES! We bonded a bit over cookie recipes and then went back to chasing our little ones. They weren't dipped that day but were still the best ginger cookie I had ever had.   When she suggested dipping these cookies, I decided that Lauren and I could be friends forever. Thankfully, she's sharing the recipe so the rest of us can enjoy them anytime!

Ginger & White Cookies

¾ cup shortening
1 cup sugar
1 egg
4 tablespoons  molasses
2 cups flour
2 teaspoons baking soda
1 teaspoon salt
1 teaspoon ginger
1 teaspoon cinnamon
Sugar for coating
1 package white almond bark

Preheat oven to 350. In a large bowl, cream shortening and sugar together then add egg and molasses and mix well. In a medium bowl, whisk together dry ingredients (flour through cinnamon).  Combine all ingredients in the large bowl and mix to combine. Shape a tablespoon of dough into a ball. Roll in sugar. Bake for 12 minutes. Allow cookies to cool.

Melt almond bark according to package instructions.  Dip cookies half-way into the melted bark, then place on parchment or wax paper and allow to harden.  
  
Makes about 36 cookies.


We packed the cookies with parchment paper between each cookie, some tissue paper, and the recipe. . . . and a lot of bubble wrap!  We will let you know about the cookies we receive soon:)


Thursday, December 1, 2011

Advent Calendars


Happy December 1st!  I have been watching the date because I am excited to start this year's Advent Calendar! Here are a few of my favorites (in addition to ours!):

  • Nativity Advent Calendar - each of the 25 spots has a piece to the nativity scene
  • Vintage Advent Calendar - this is the one we had in our house growing up. Mom - I love this one so much and hope you saved it!  
  • Dylan's Candy Bar Advent Calendar - I was in the store yesterday, and they had lots of these on sale for $6 (normally $12).  Pre-packaged with candy and very kid-friendly!
  • Do-It-Yourself Advent Calendar - my favorite DIY versions are this one from Oh-Dee-Doh and this one from DesignSponge. Both versions use simple supplies and would be fairly quick to make. 

Last year, I looked and looked for 25 tiny toys to fit in the advent calendar. This year, we are simplifying and using the Dylan's Candy Bar version.  Next year, I think I will try slips of paper with Christmas Story Bible verses and/or fun family activities (like "bake Christmas cookies!")

Anticipation for Christmas is building...
Love, Lauren